


Installation
At least two adults are required to install Tecrostar mezzanines, (they do not need to be DIY professionals). It is recommended to use safety equipment such as gloves, boots, etc., to avoid any accidents.
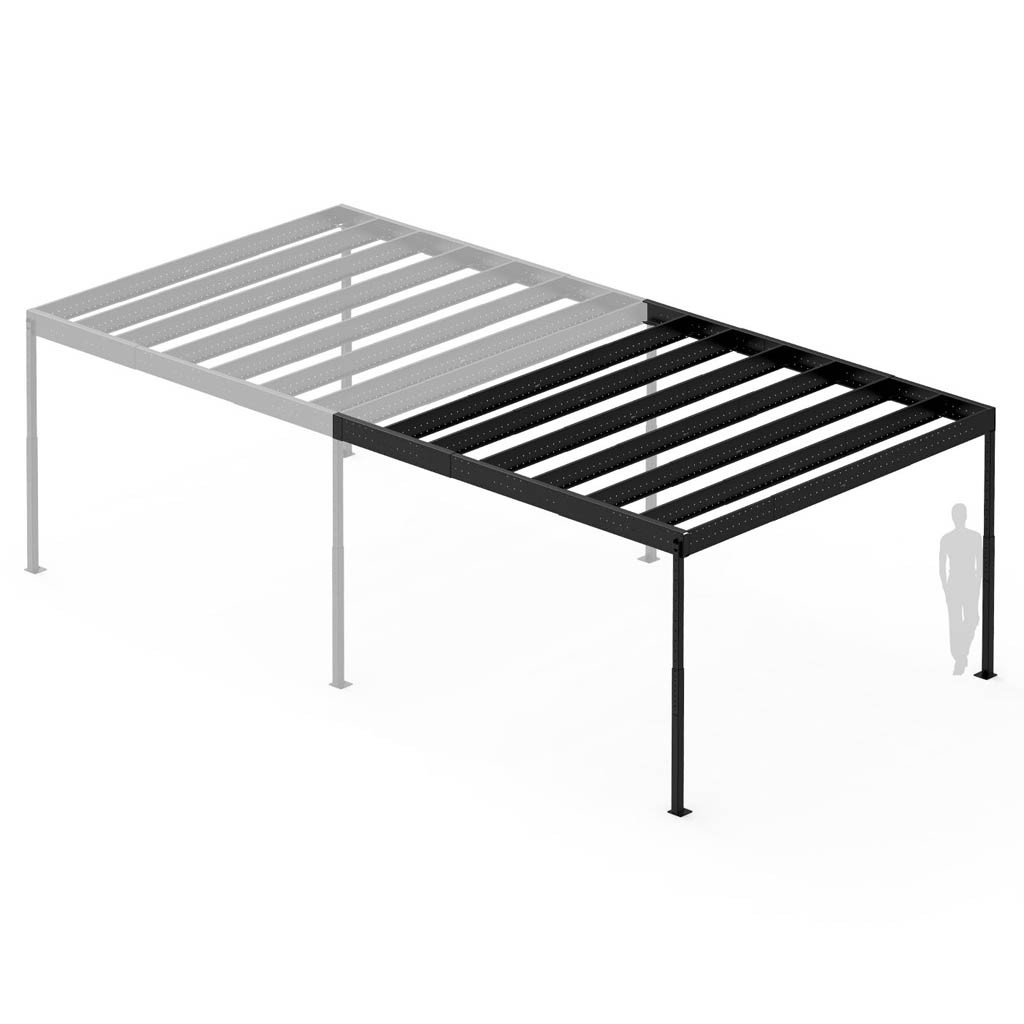
For the mezzanine floors in the L and XL range, a scaffolding or ladder system may be required for work at height and manual or electric lifting equipment for the primary beams, especially if the structure is over 3 m high. All other ranges are easily lifted by hand.
You will need the following tools to install the mezzanines: tape measure, a spanner set for nuts and bolts and a screwdriver (an electric screwdriver makes the job much easier), a spirit level, hammer, drill and a cutting tool for the board (handsaw, jigsaw, circular saw...).
Yes. As they are manufactured with light steel profiles with a high yield point they are very light and the load per column is very low. The only restriction is the storage load on the mezzanine: instead of 200kg/m², it may be reduced to 800kg for the whole mezzanine.
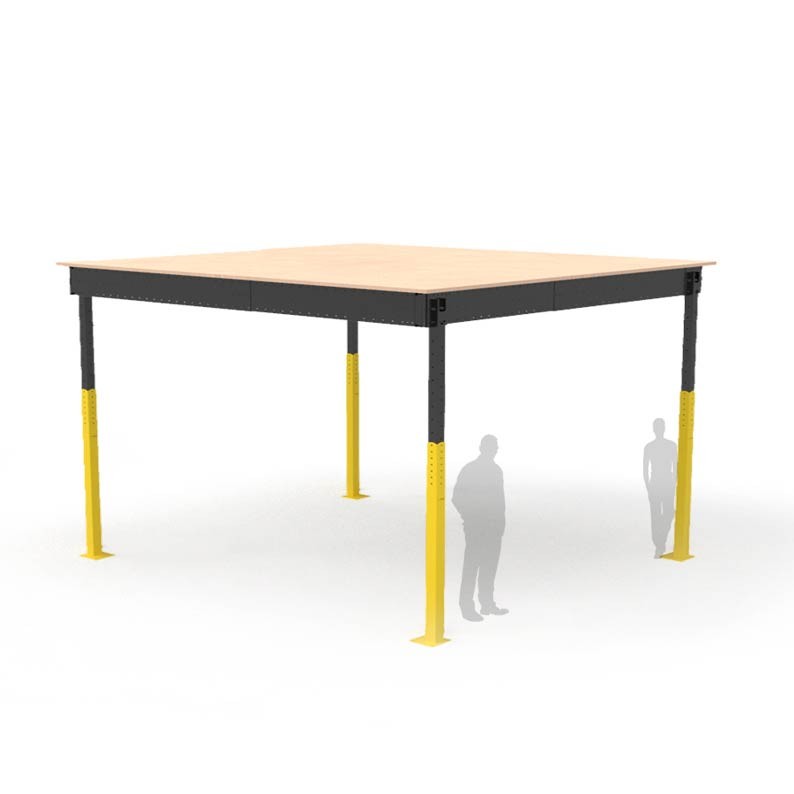
A home with a concrete structure usually supports a point load of at least 200kg on a surface of 5x5cm. The T8 mezzanine weighs 199kg and the T15 mezzanine weighs 356kg, both weights are distributed over 4 columns.
You can install either of these two metal mezzanines in your home, provided that the load stored on them is limited. Ask Tecrostar about the specific features of your project.
You can do it yourself with the help of a friend. It is easily installed in a few hours, depending on the product. The times are a guideline and for assembly only. You need to add the time it takes to measure up, move the components to the location, clean up, etc.
S Range:: 4-6 hours with 2 people
M Range: 8-10 hours with 2 people
L Range: 15-22 hours with 2 people
XL Range: 25-28 hours with 2 people
The time required for fitting accessories (ladders, handrails...) could vary between 2-8 hours depending on the quantity, as well as the type/model of accessory.
You can find an fitter near you on misterassembler.com. This website puts fitters and customers in contact, so the price and the responsibility of the installation is the fitter's. This website is not associated with Tecrostar.
Tecrostar can provide you with an estimate of the cost of assembly that depends largely on the distance between the assembly team and the installation site and the type of service hired (prior visit and measuring, delivery service and transport of goods to the site).
In any case, this estimate must be agreed between the client and the fitter.
One of the most important sections is attaching the mezzanine. For greater safety and stability we recommend attaching the columns to the floor with the fixings supplied with the kit. In addition, we recommend attaching the mezzanine to the adjoining walls in order to stabilise the structure. The components for attaching the structure to the wall are also included.
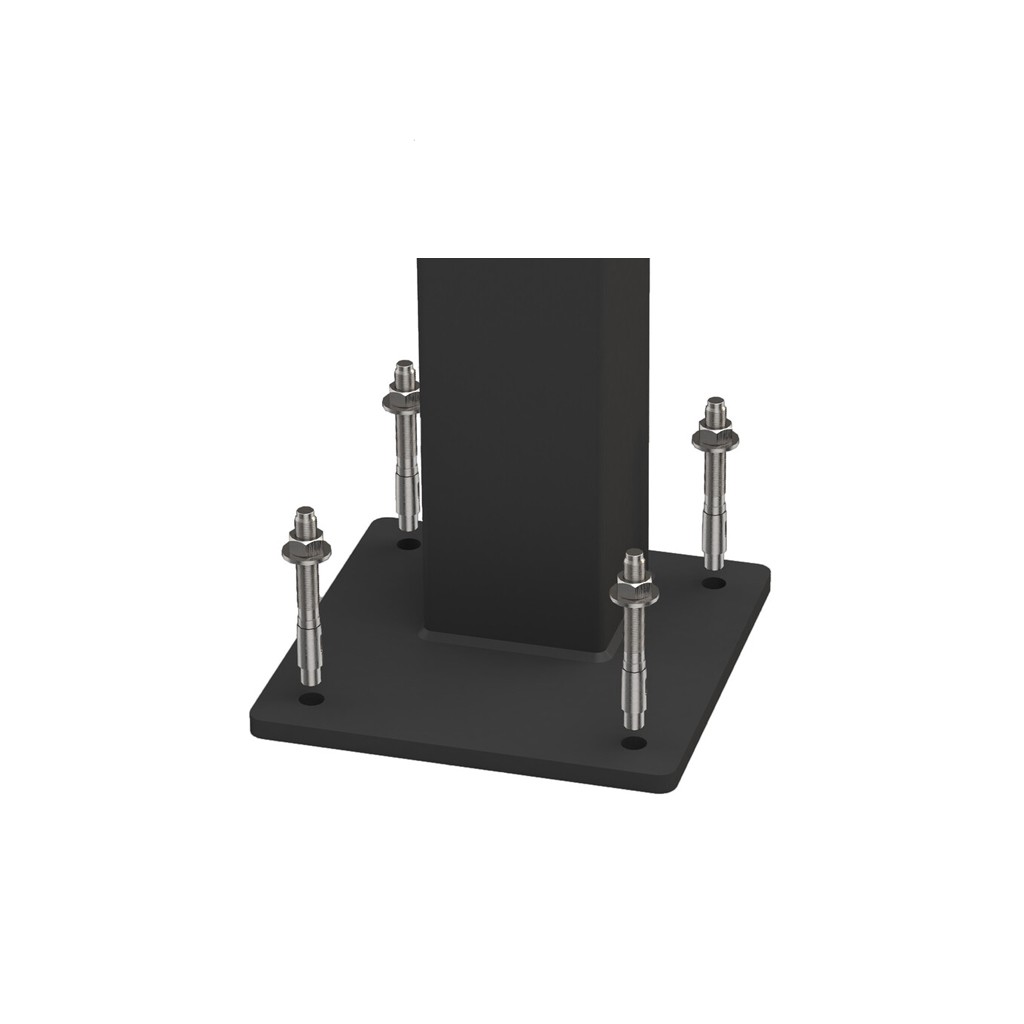
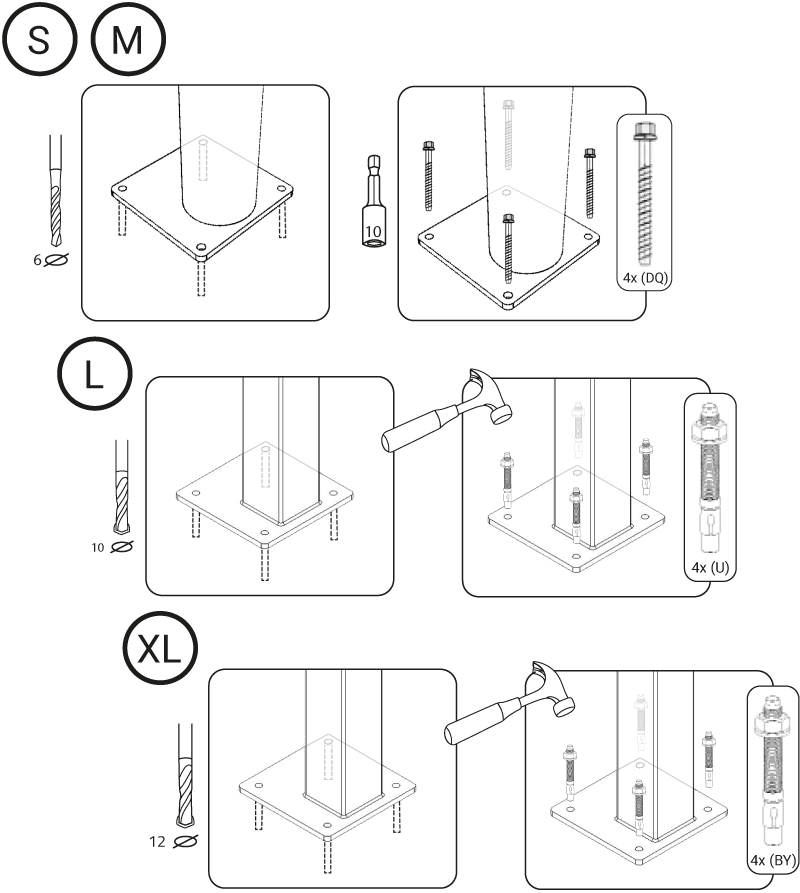
Anchoring the columns to the floor
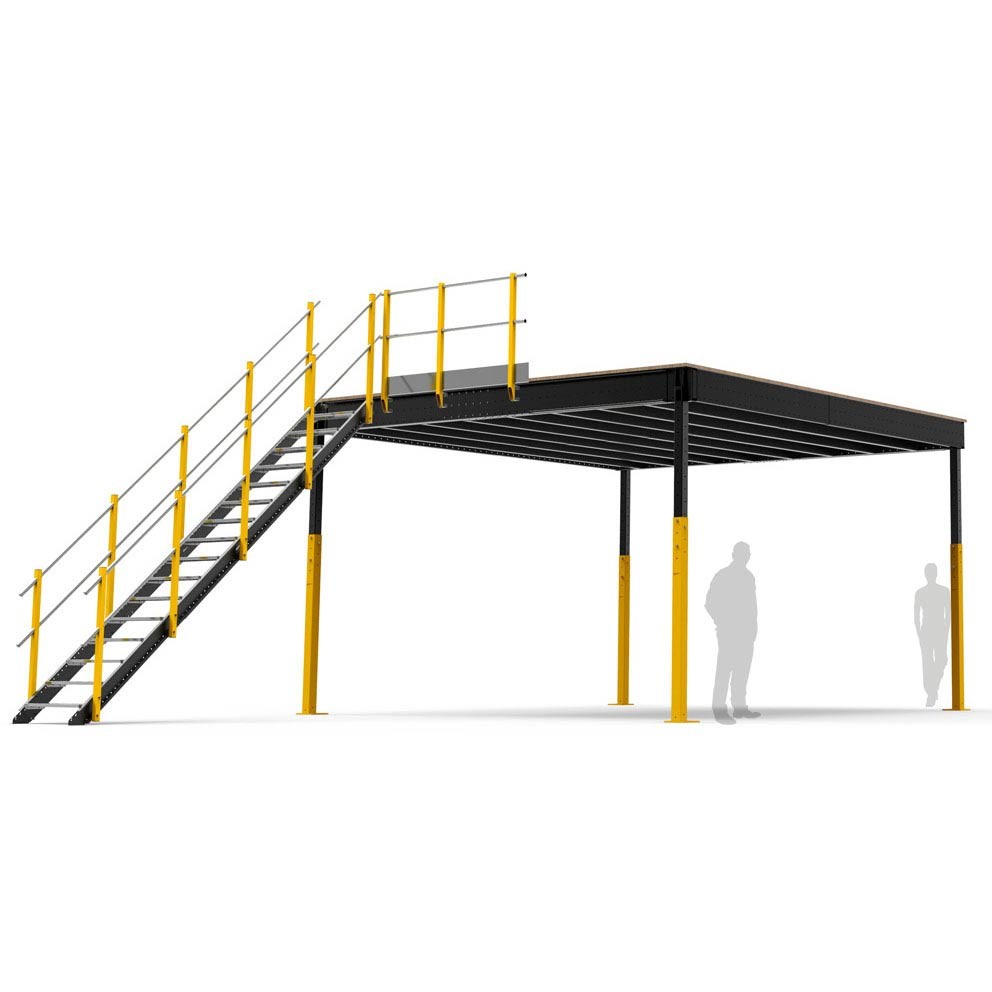
Anchoring the columns to the floor adds stability to the structure. We always recommend anchoring them, especially if mezzanines are installed in places where the columns can be knocked into (circulation of forklifts, etc.).
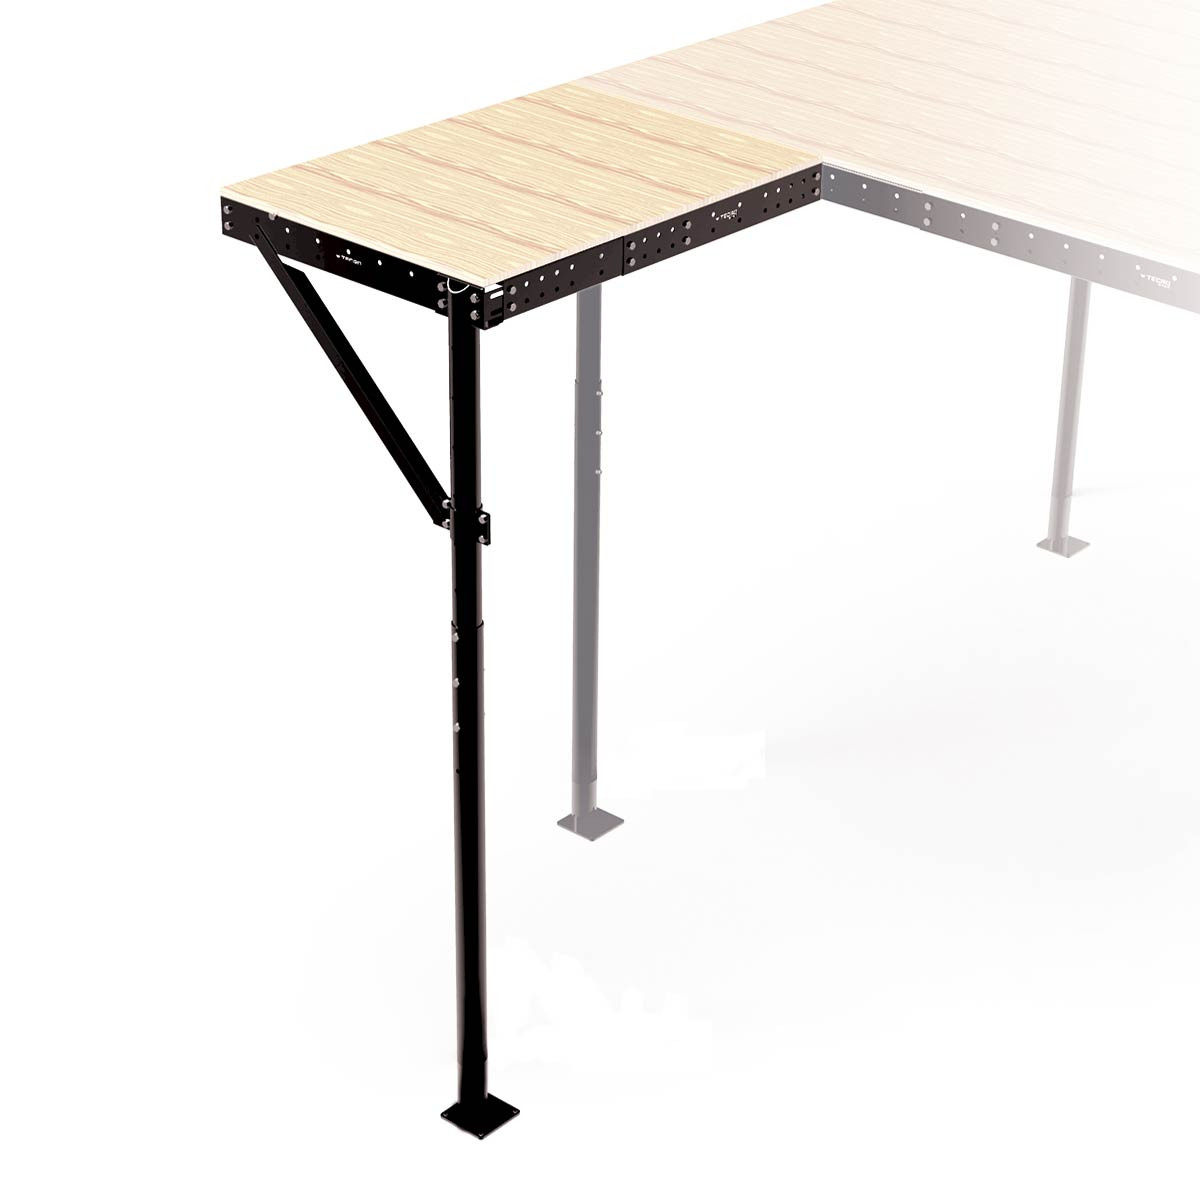
If the mezzanine is installed in a home and it is attached to the wall you can purchase column base kits so you don’t have to anchor the columns to the floor.
Attaching the structure to the wall
Depending on the number of adjoining walls, there are different systems for improving safety and stability.
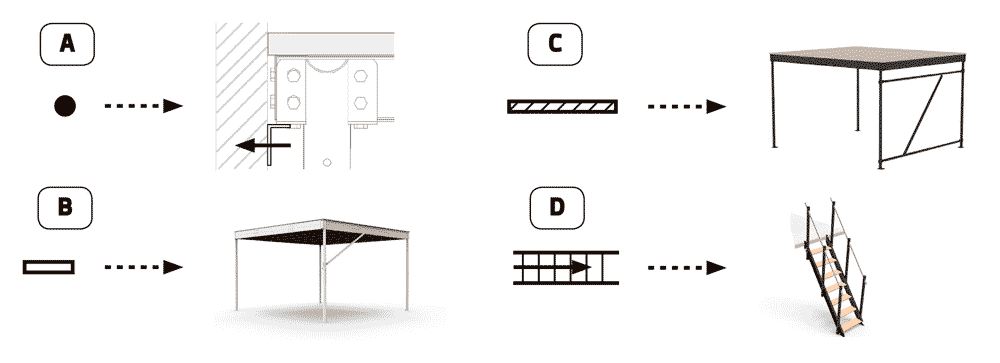
Key:
A) Wall fixations (supplied with the kit)
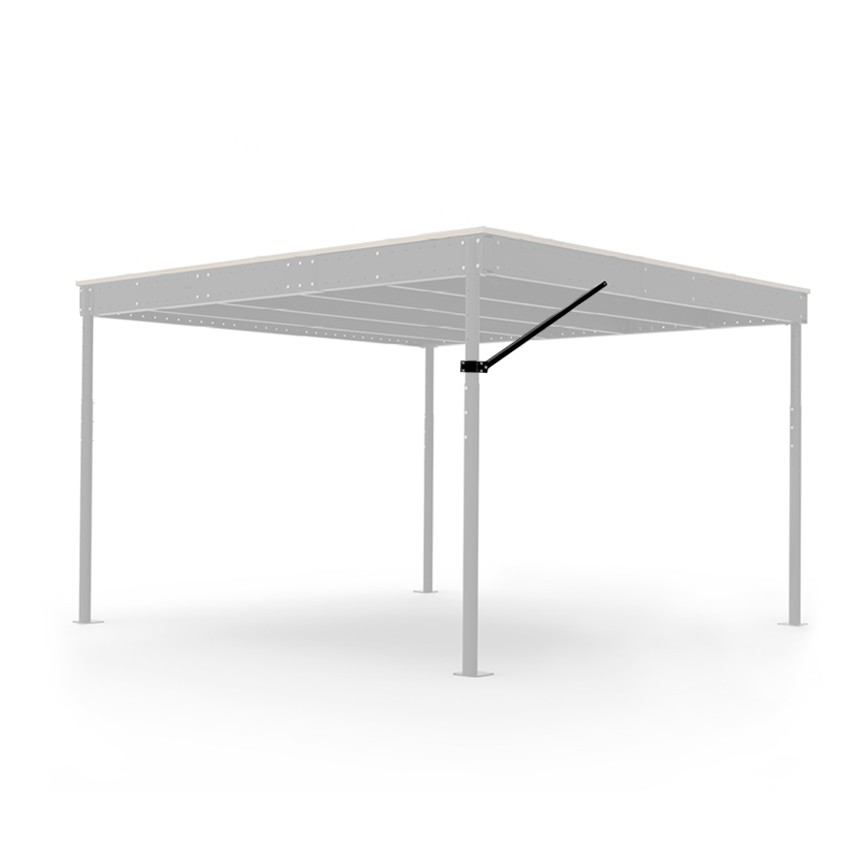
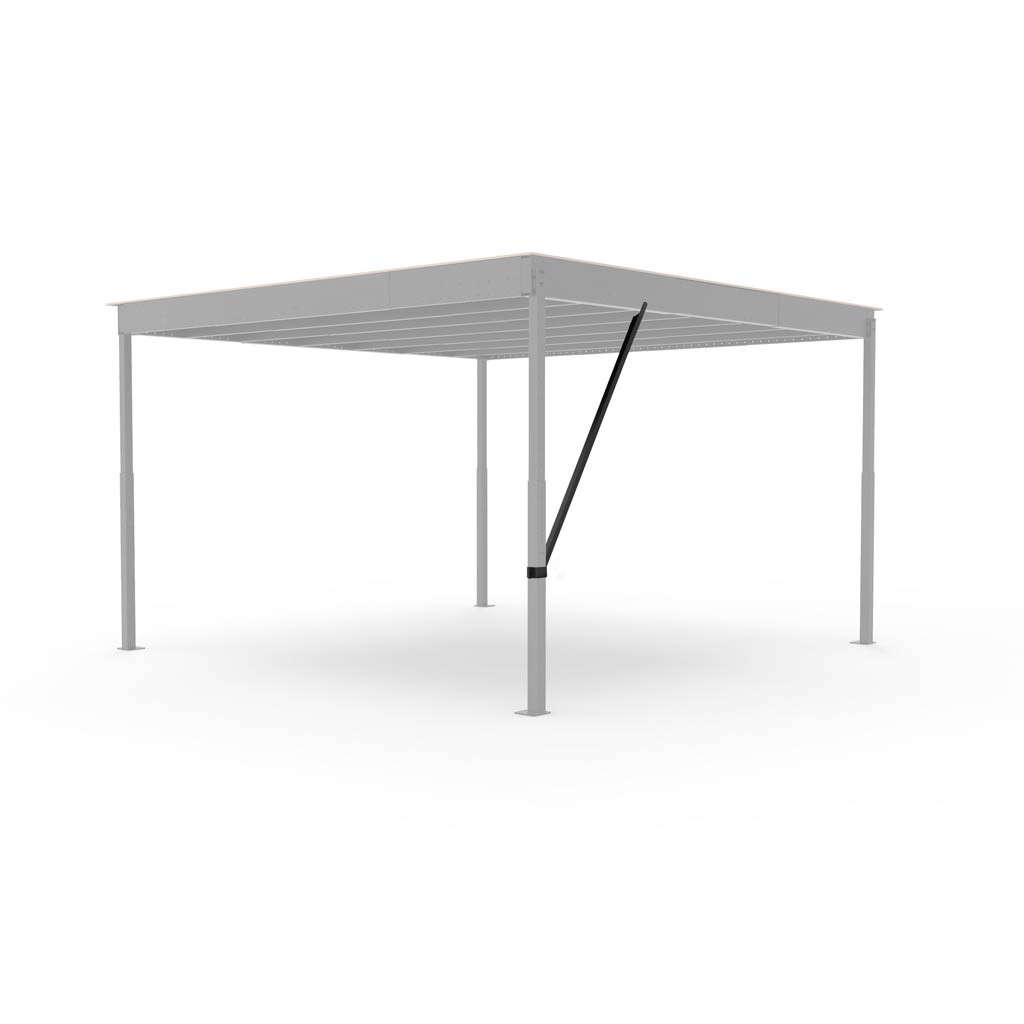
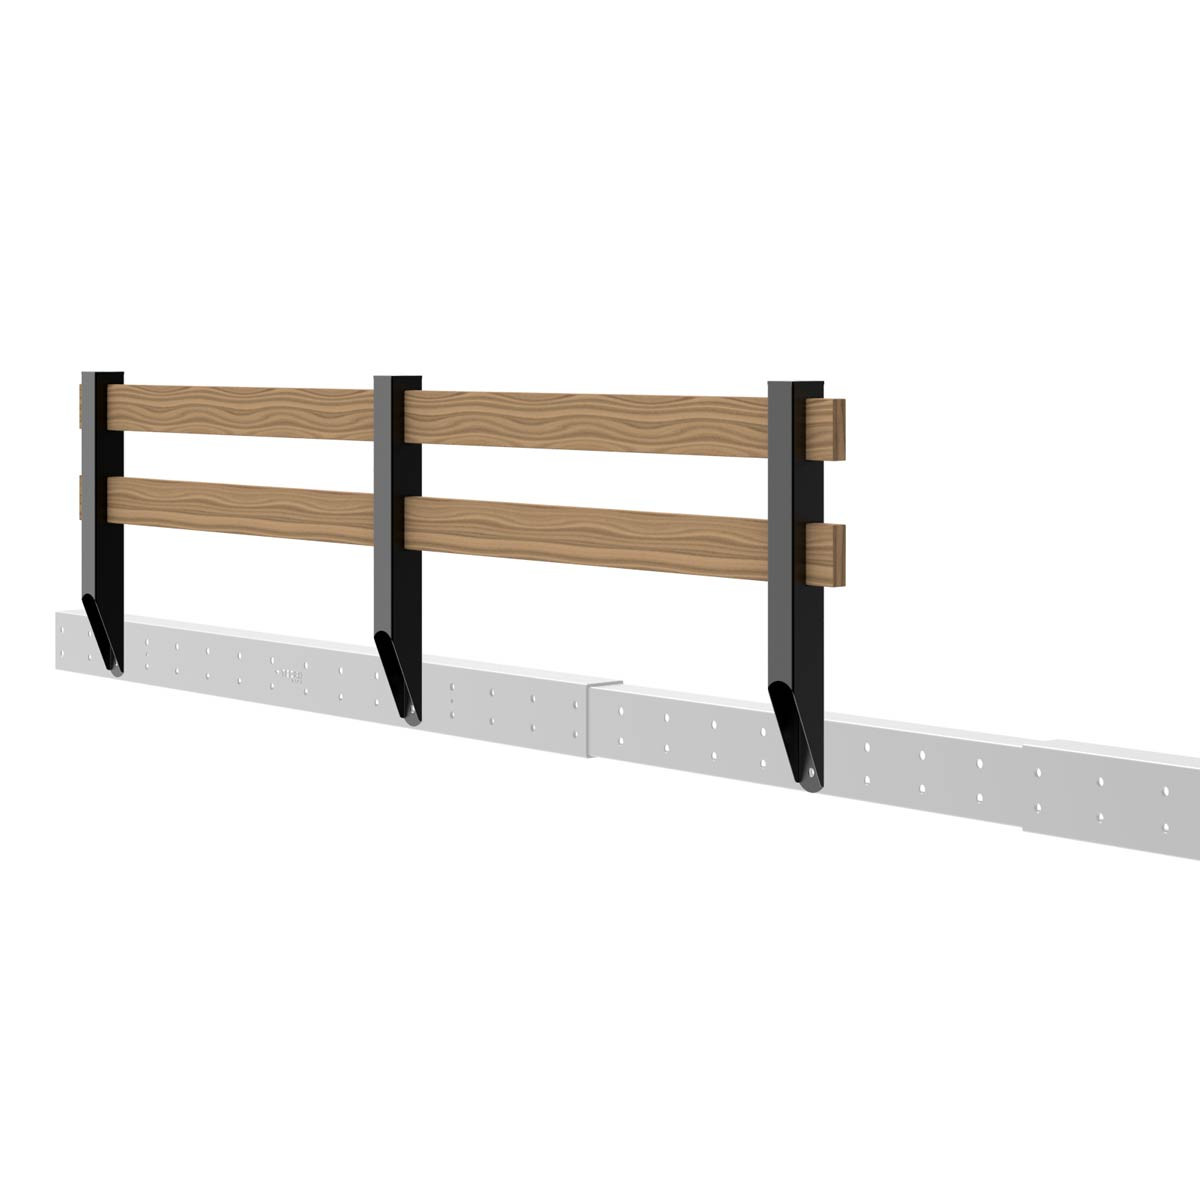
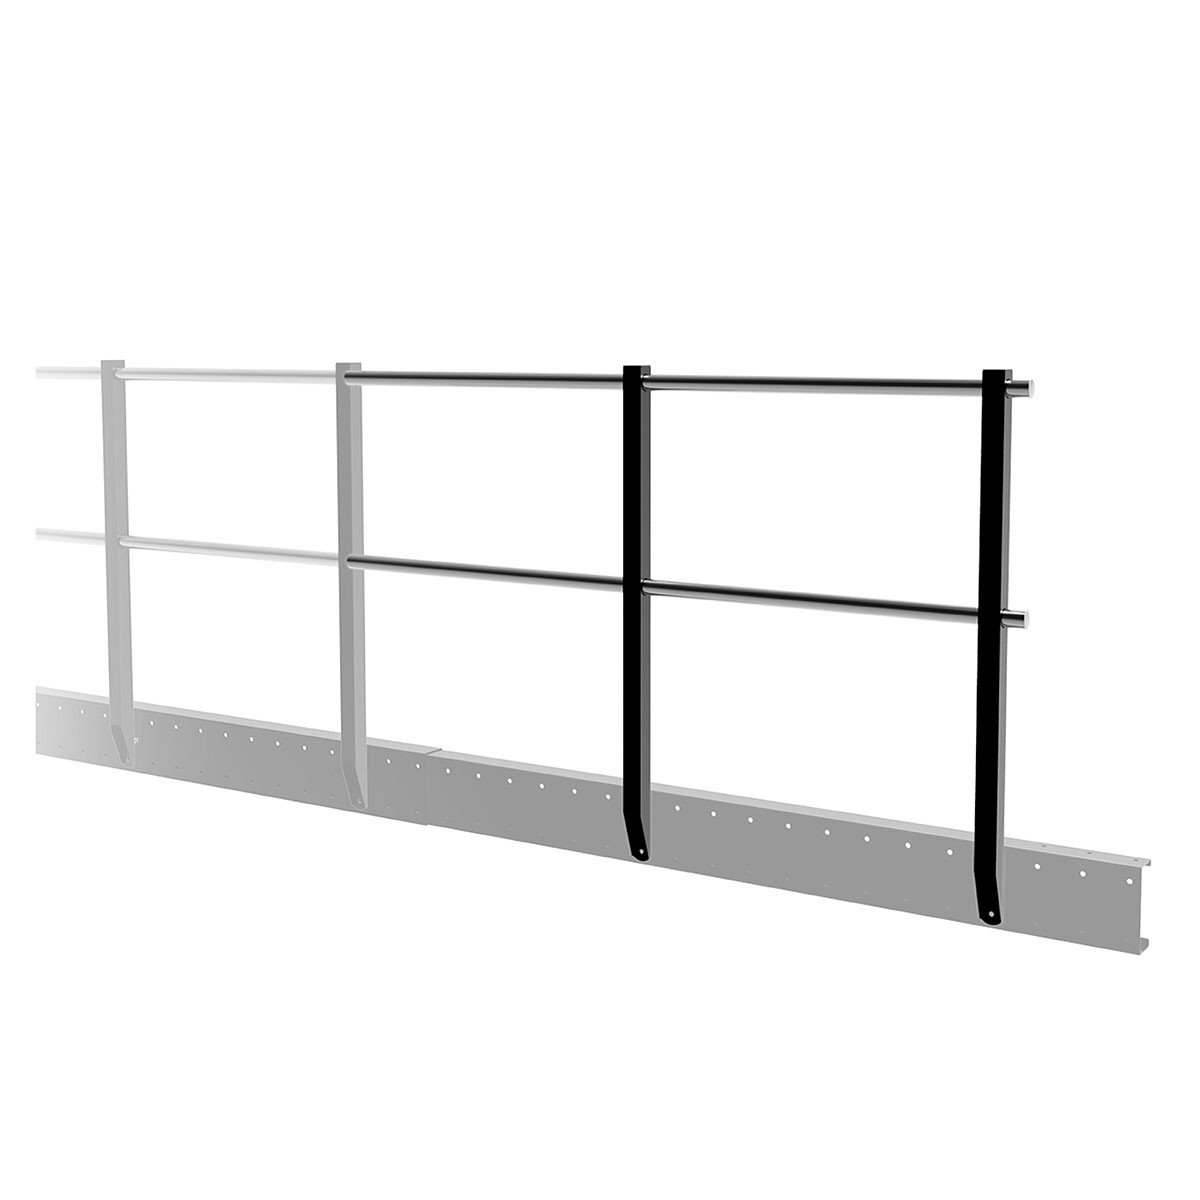
B) Stability bar
C) ‘Z’ stability kit
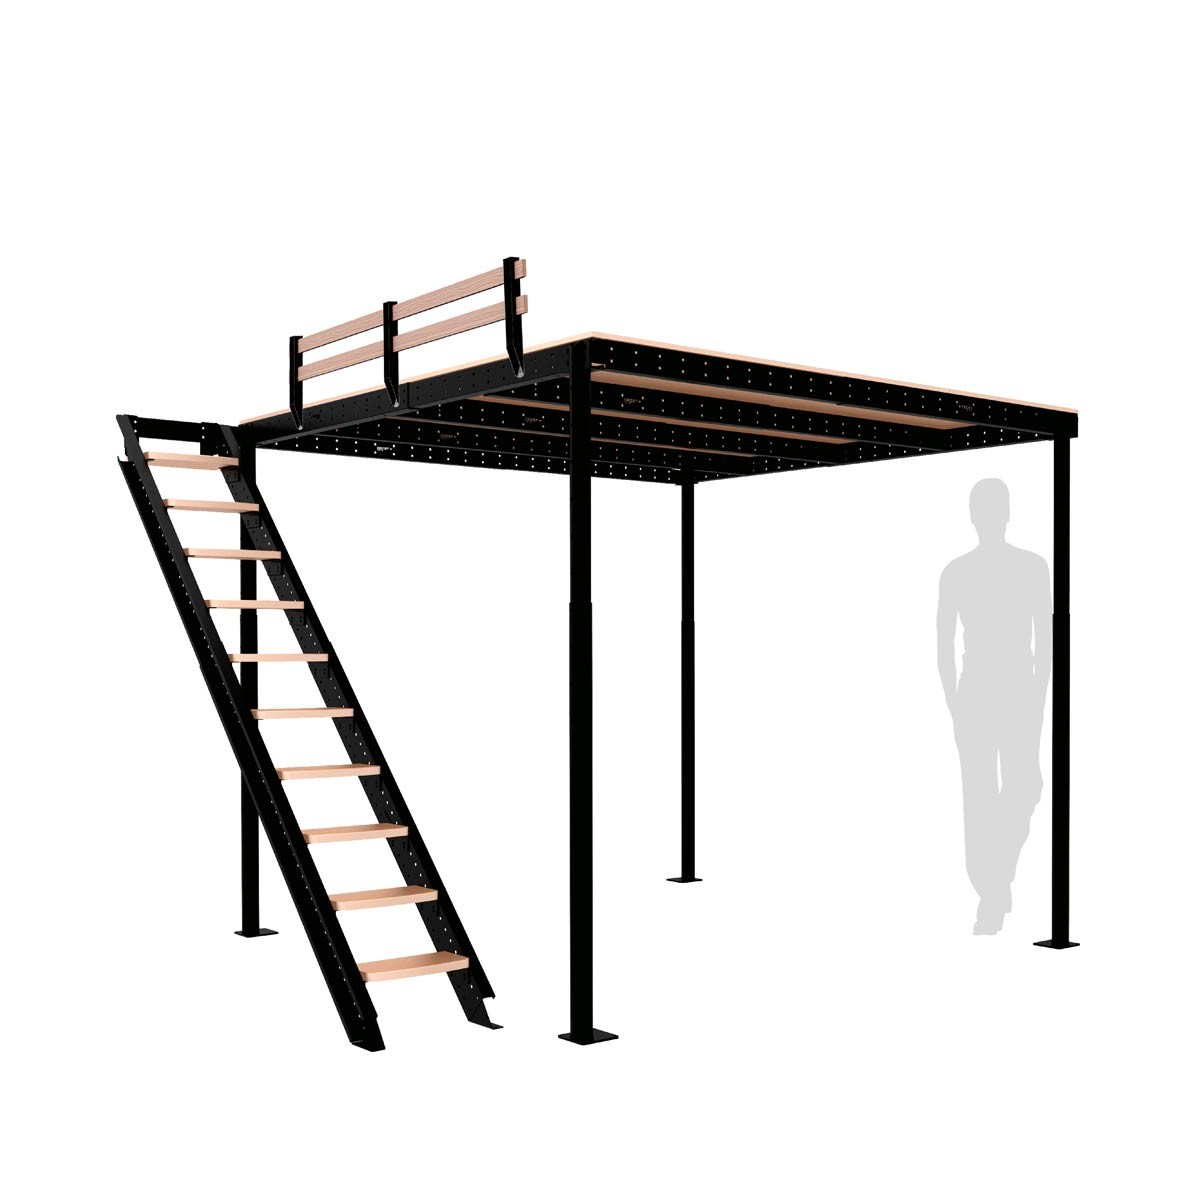
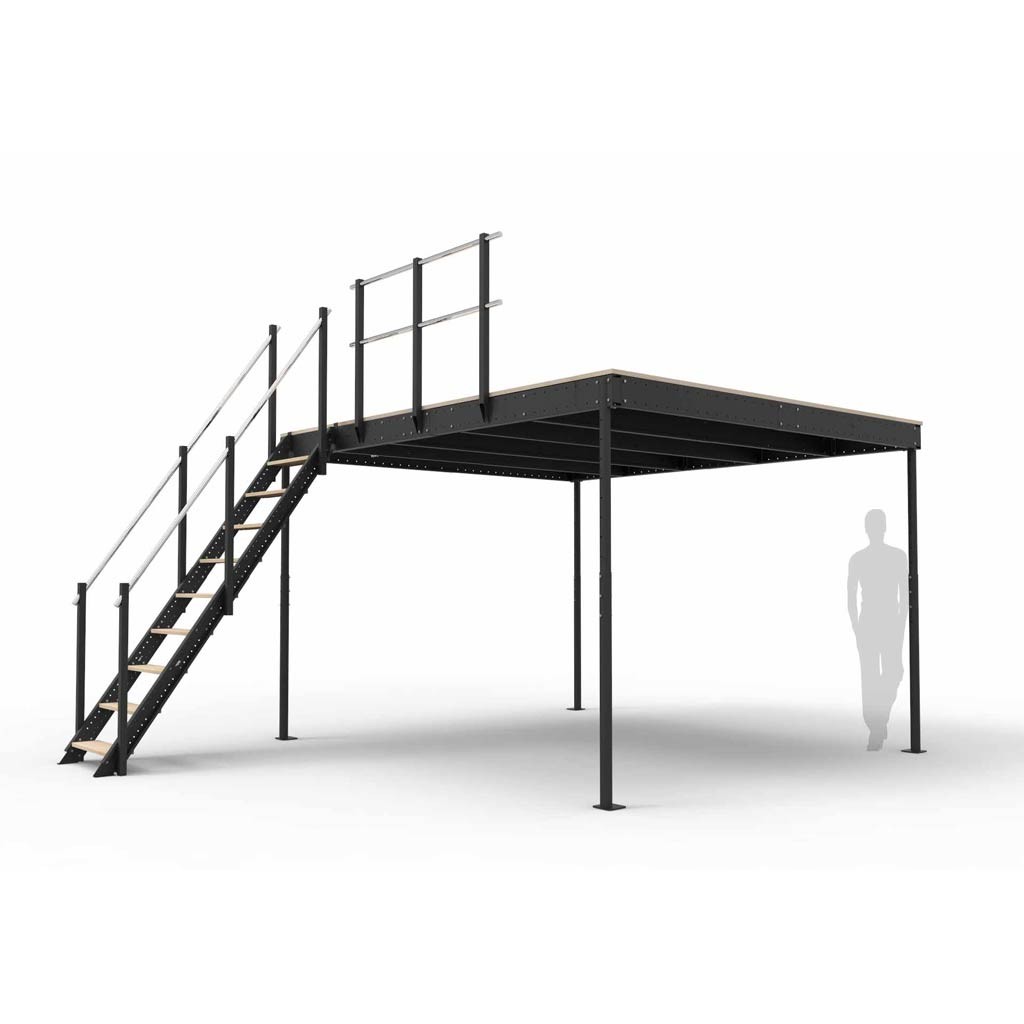
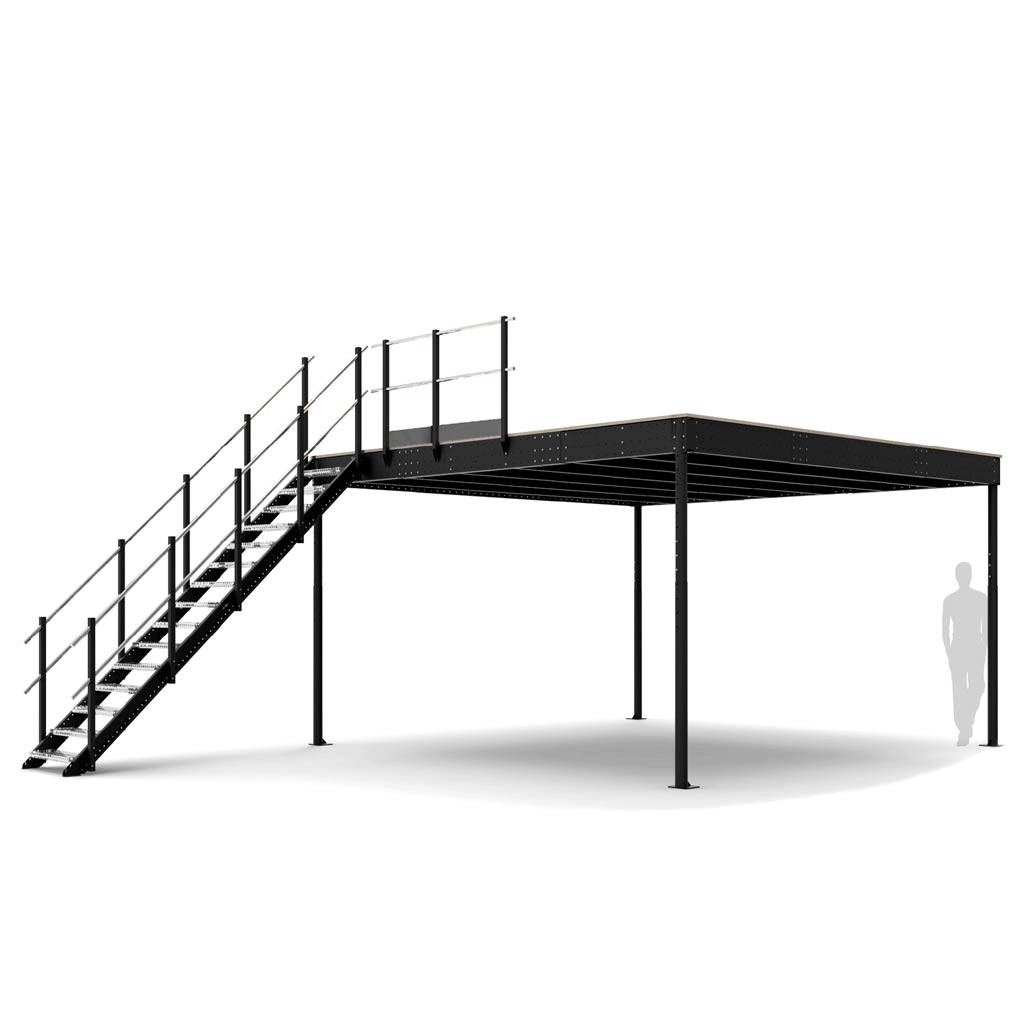
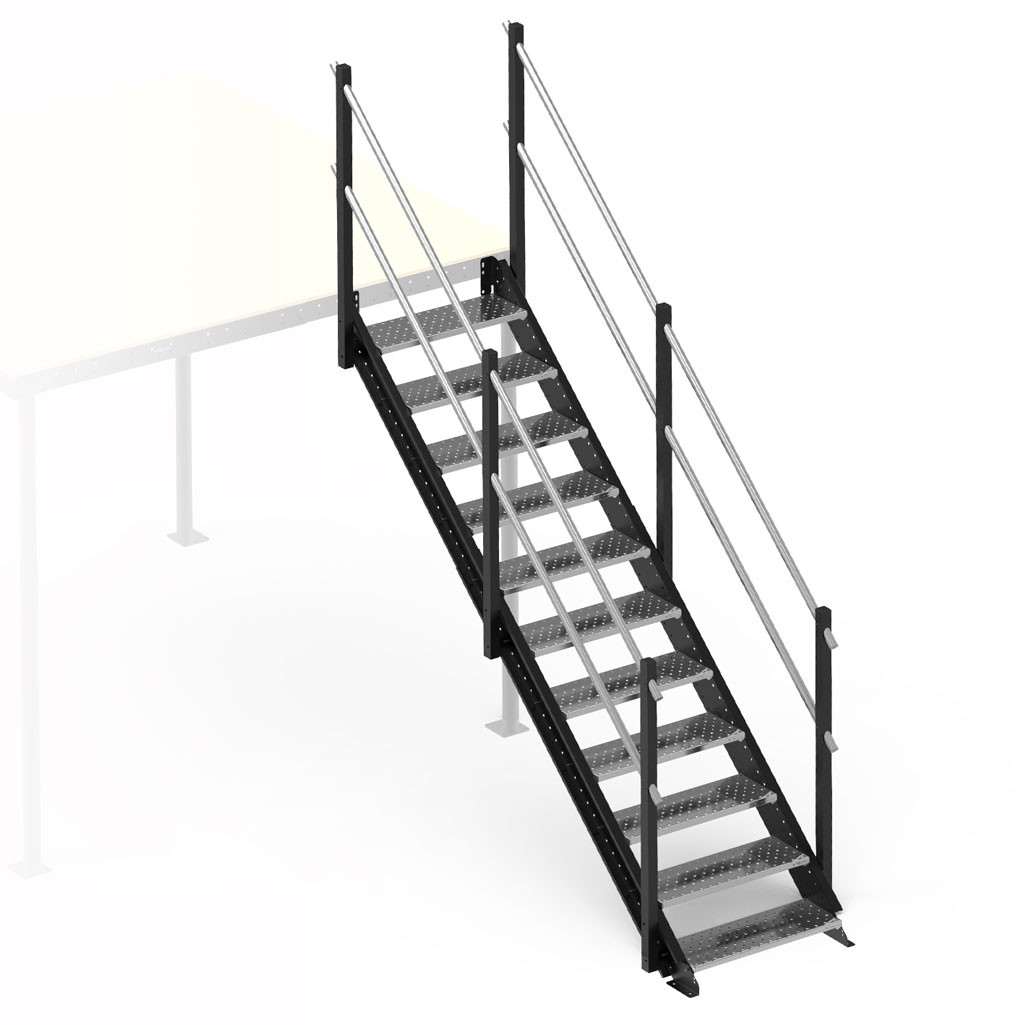
D) Stairs (the stairs stabilise the structure)
E) Wall stability bar
-
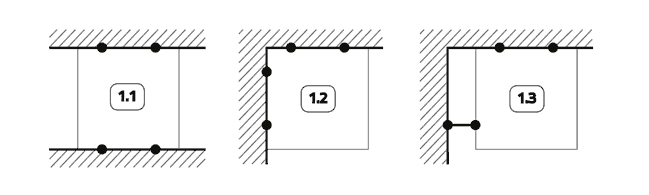
Two walls and anchored to the floor:
1.1 Two facing walls. Only wall fixations are required.
1.2 Two perpendicular walls. Only wall fixations are required.
1.3 Two perpendicular walls, one of them further away from the mezzanine. Wall fixations and wall stability bar on the separated wall.
-
One wall and anchored to the floor:
2.1 Attached to one wall. Two stability bars are required
2.2 Attached to one wall and stairs parallel to the wall. No stability bars are required
2.3 Attached to one wall and inside stairs parallel to the wall. No stability bars are required
2.4 Attached to one wall and stairs with landing. One stability bar is required

3. No walls and anchored to the floor:
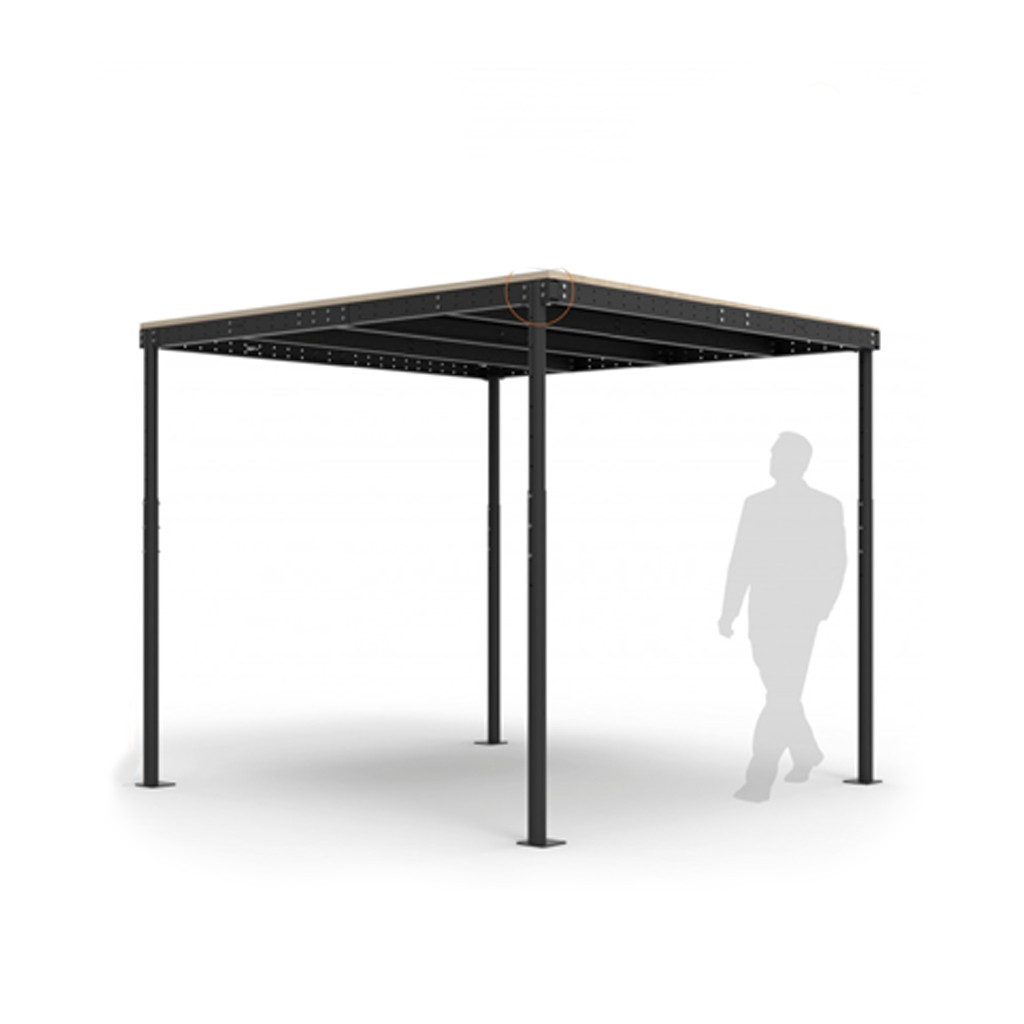
3.1 Without stairs. Four stability bars are required
3.2 With stairs. Three stability bars are required

4. No walls and not anchored to the floor:
4.1 Without anchoring to the floor, without walls and without stairs. Two ‘Z’ stability kits and four normal stability bars are required.
4.2 Without anchoring to the floor, without walls and with stairs. Two ‘Z’ stability kits and three normal stability bars are required.

5. Three walls
Stability kits are not required but you do need to attach it to the walls. It is important the wood floor is rounded off against the walls.
Type of wall anchor
The walls can be made of different materials, according to which one type of bolt or another must be used to attach the structure to the wall.
M1 – CONCRETE: Screws with plastic anchors
M2 – SOLID BRICK: Screws with plastic anchors
M3 – HOLLOW BRICK: Chemical anchors
M4 – HOLLOW PARTITION WALL: Metallic expansion anchor with screw
M5 – WOOD OR BOARD: Screws can be directly used.

*(These screws and wall anchors are not included in the kit)
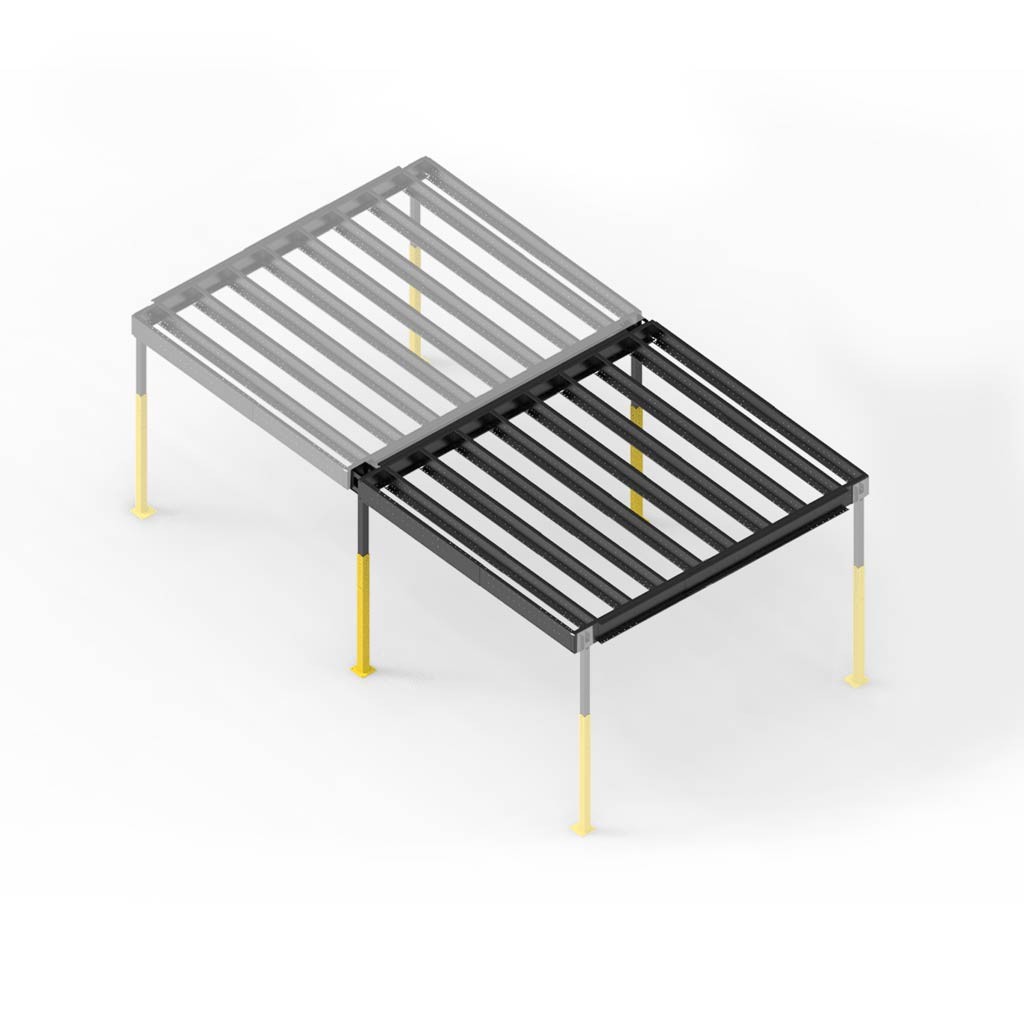
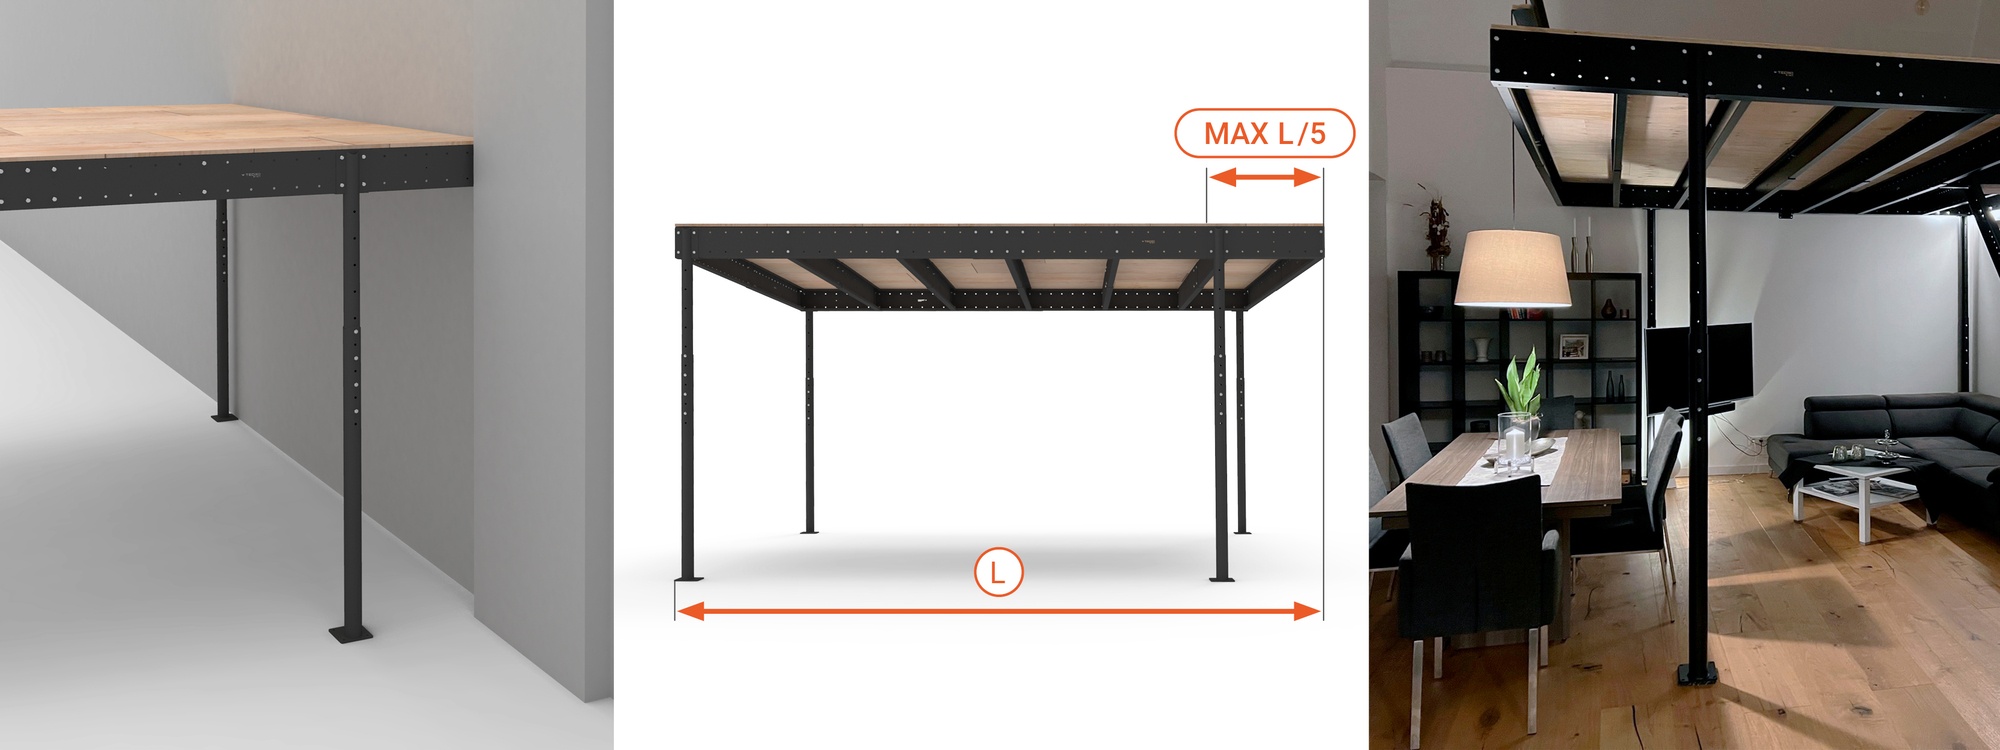
Yes. The columns can be moved to the corners up to 1/5 of the total length of the structure. This feature allows you to work around the walls, switches or furniture you have on site without compromising safety.
Yes. They can be installed on a surface that is not a Tecrostar surface.
Wall anchors for concrete or brick are used to fix staircases to walls made of these materials.
The customer must bear in mind that they are responsible for the strength of the joint and structure to which they are anchored.
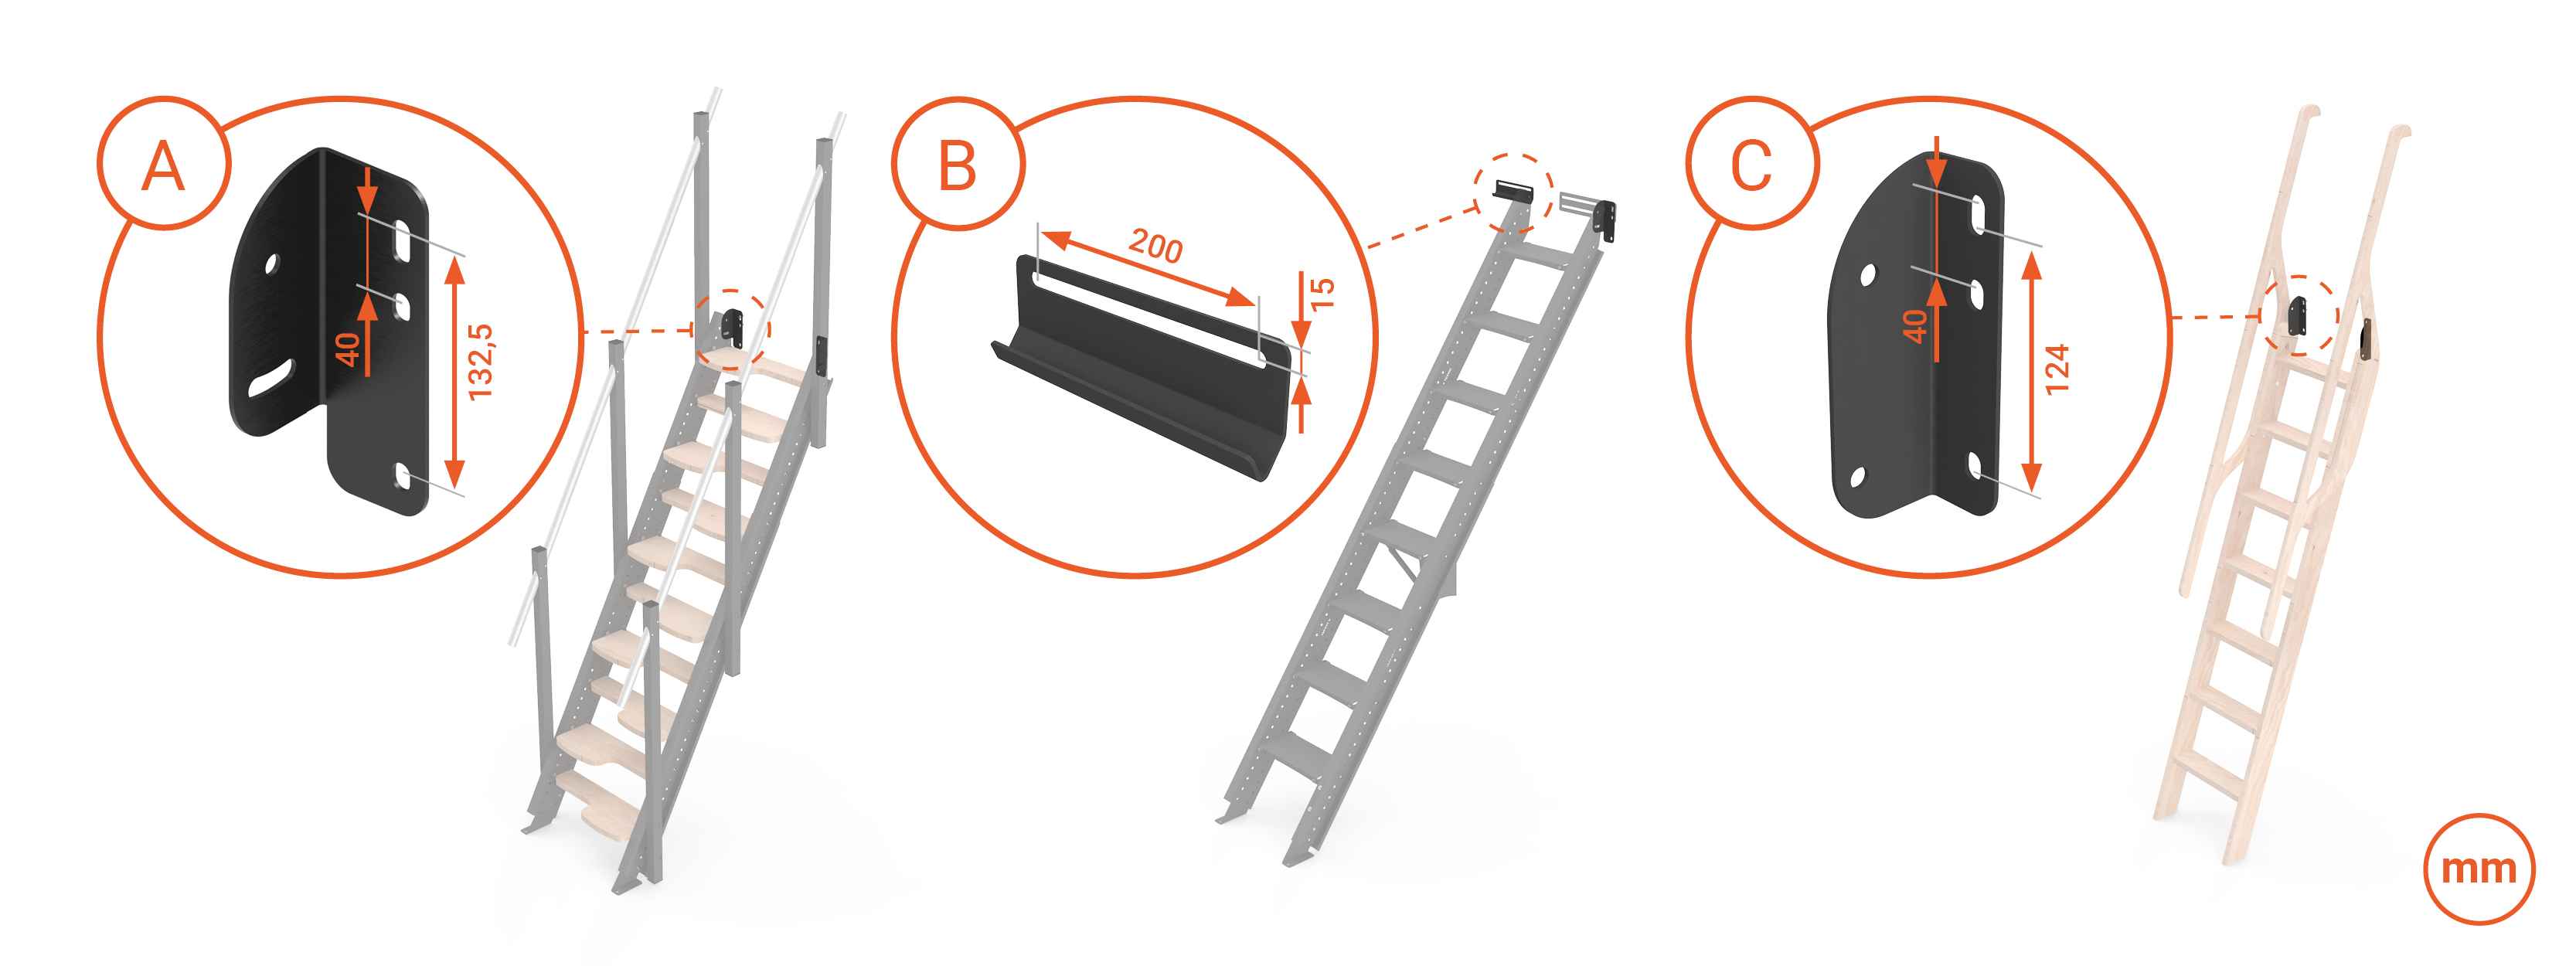
If you need to anchor the stairs to a structure that is not a Tecrostar structure, see the following details about the anchors:
- Anchor A: References that have this anchor:32800, 35200, 35300, 31700, 30900, 31301, 32004, 34001, 32601, 31800, 32500, 34100, 30401, 31102, 30303, 30501, 31003, 32700, 30700, 35000, 31400, 32100, 35100, 31500, 32200.
-
Anchor B: References that have this anchor: 35200, 35300, 31700.
- Anchor C: References that have this anchor: 30601, 30801.
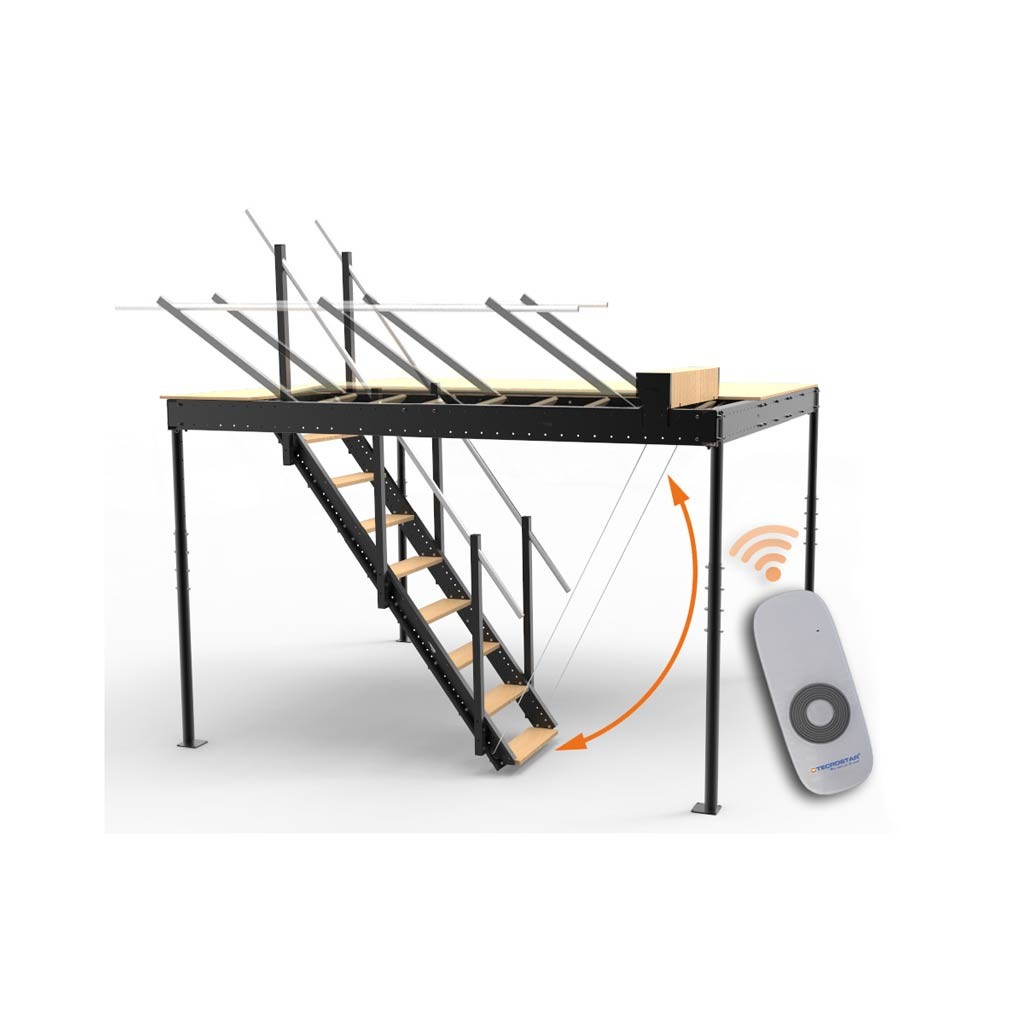
The anchor that connects the ladder to the mezzanine can be fastened with 2 or 4 screws. If you opt for the 2-screw configuration, the ladder will have the ability to pivot upwards. It is important to note that in both cases the ladder retains the same strength.
This adjustment is available on all Tecrostar straight flight ladders.
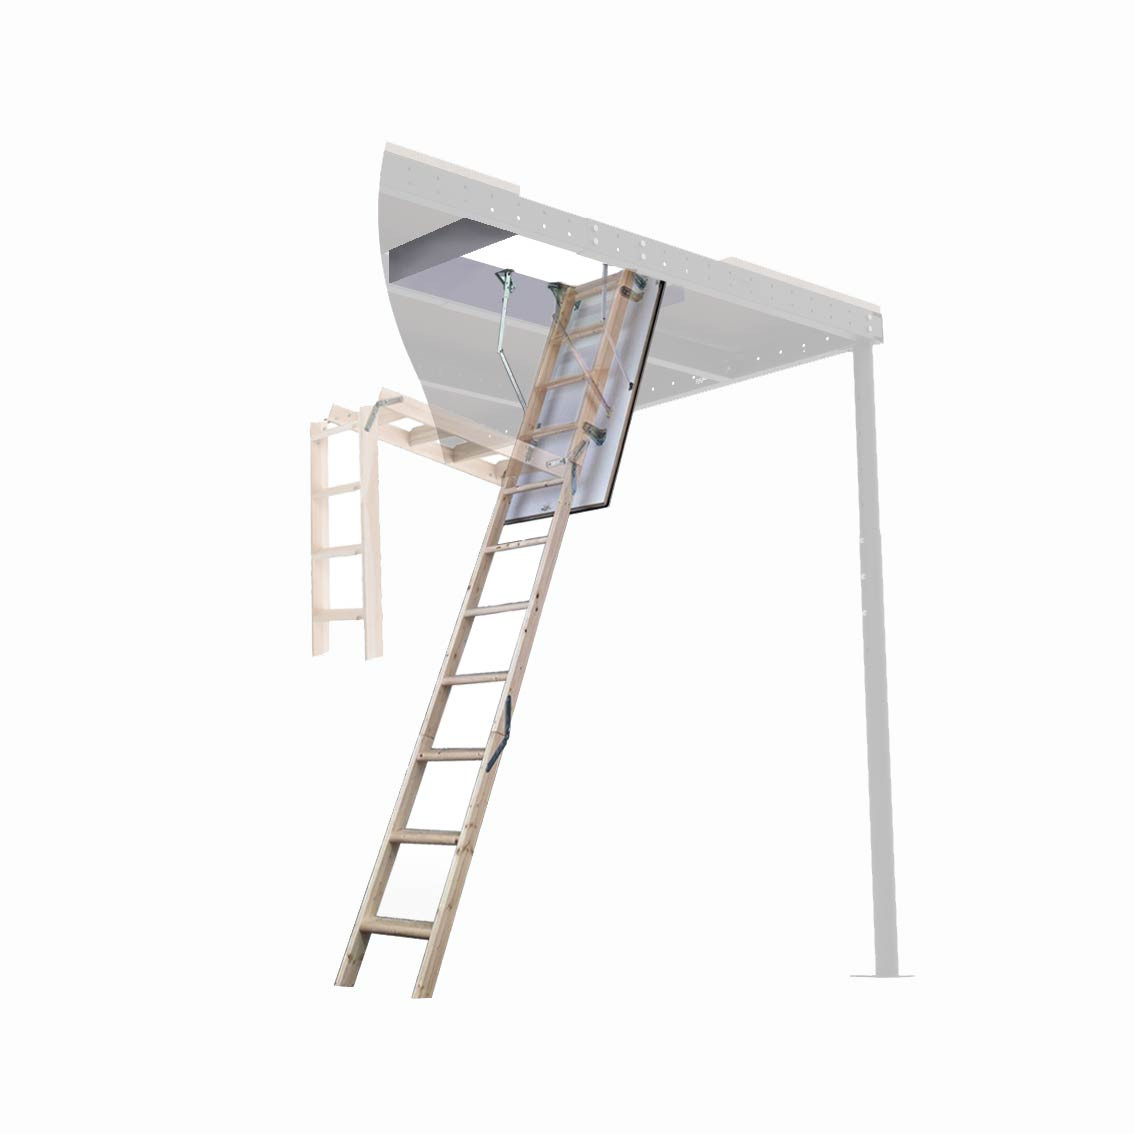
With the Electrical stair lift kit compatible with Japanese, straight and side ladders, you will be able to lift your ladder in complete safety and hide it at the height of the mezzanine.
Each model of stairs has an inclination and it cannot be changed unless otherwise stated. You must choose the stairs that best suit your needs.
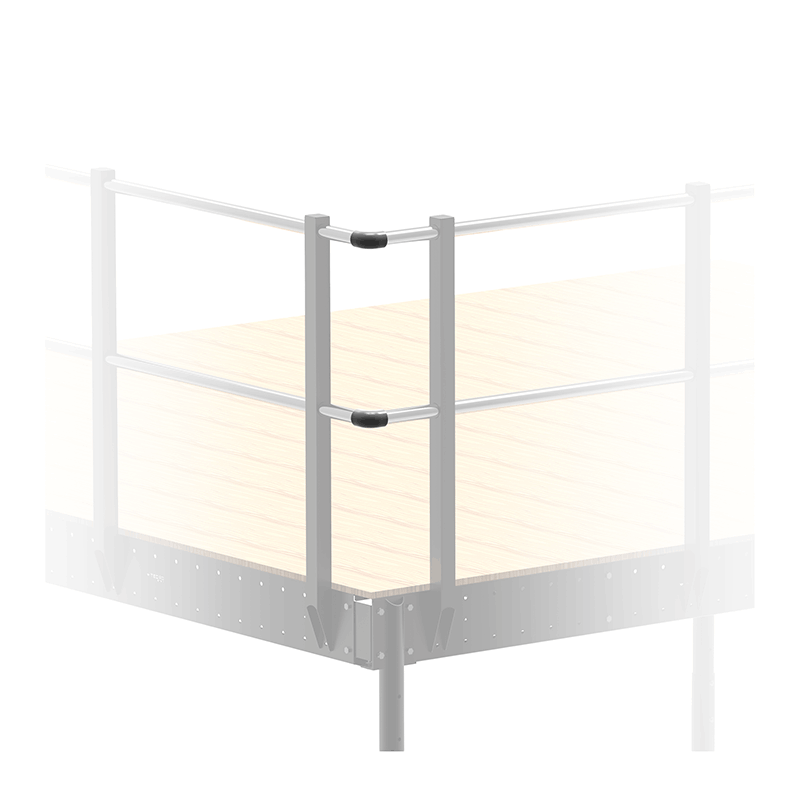
Yes, the railing of both sides of the stairs is removable and, therefore, it can be taken off. However, we recommends to install it for security and because they provide rigidity to the stairs as well.
On the other hand, the stairs include the railing; it is not possible to acquire them without the railing.
No, our mezzanines are sold with columns by default. We cannot guarantee the resistance of walls or corbels and the customer will be responsible if the product is modified in these cases.